
Learning Aviation Photography

Russian Antonov AH-124-100 parked on the ramp
Aviation has been a passion of mine since I was very little. My grandfather flew cargo transport for the Navy in World War II and the Korean War. I will never forget all the joyous memories with him and aviation! When I reached my college years I earned a degree in aviation management from Auburn University, but soon realized I was meant to be in photography and video! While working full time at an international airport, I would bring my camera with me and capture all sorts of aircraft that visited our airport! I left my job in airport operations after working there for 2 year to pursue photography & video. Now don’t think I’ve walked away from aviation entirely. I still spend time with the aviation community at local airports and other events near my home. A while back I decided to give aviation photography a try! After all it was my two favorite things mixed into one! Let me share with you what I’ve learned as well as what results I’ve been able to achieve!
Let’s Start With Equipment
All my photography and video is captured on a Canon EOS R. It’s a full frame, mirrorless camera that has produced some incredible shots for me after all these years! For the lens I’m working with Canon’s EF series 70-200mm f2.8 MKII. If you have a lens that can go even further than 200mm, then by all means use it! It can be difficult to get detailed shots of aircraft from far distances! When I started out, I tried using a monopod to help stabilize the shots, but found that I was better off with going handheld since the lens’s stabilization was very good. I do wear a strap as a way to just make sure I don’t drop my camera! When I started out, I tried to experiment with ND filters, but found that with all the various settings I was making to the camera, the filter was not really necessary. You’ll probably understand why once I explain my settings in just a moment.
Camera Settings
If you’ve ever done any sports photography, the camera settings are very much the same. The difference in your settings depends on the type of aircraft and how fast it’s going past you. If you’re capturing images of a jet, your shutter settings will be different than what you would have for a propeller driven airplane because the actual movement you’ll see will come from the propeller. You don’t have this issue with jets!
When I originally started taking pictures of moving aircraft, I thought the shutter settings would be pretty high since the shutter is designed to capture faster moving objects right?! The best shots I’ve captured so far have not been this way. I’ve caught myself capturing aircraft with a shutter of 1/80 and then increasing my aperture to nearly f.16 or higher while trying to keep my ISO at around 100! The main reason is to ensure we have a well focused image as well as capturing that motion blur from the propeller. Below you will see an image I captured of an aircraft while trying to use some modern camera settings. Note this was in my earlier attempts.
Cessna L-19 “Bird Dog” - Canon EOS R, 200mm, Aperture F2.8, ISO 3200, Shutter 1/1000
As you can see from the image above, it really didn’t come into focus. The motion blur from the propeller isn’t all that great either in my opinion. Now look at the next image and compare the settings for yourself!

Cessna 172 - Canon EOS R, 200mm, Aperture F5.6 , ISO 100, Shutter 1/160
Clearly you can see a major difference in how much sharper and focused the second image is with these settings! I found the biggest thing I did was ensuring my ISO was as low as possible! you’d be surprised how much detail you will lose if you crank that ISO up during a sunny time of day! On the EOS R I also changed my focus settings to single point focus and switched from one-shot auto focus to servo because I needed to be able to follow the aircraft on a single point in the middle of the frame. If you leave auto focus on you will lose detail in your image even if the auto focus was successful at tracking the aircraft. I would highly advise sticking with a single point in the center of the frame and switching to servo. Trust me, you’ll be glad you did!

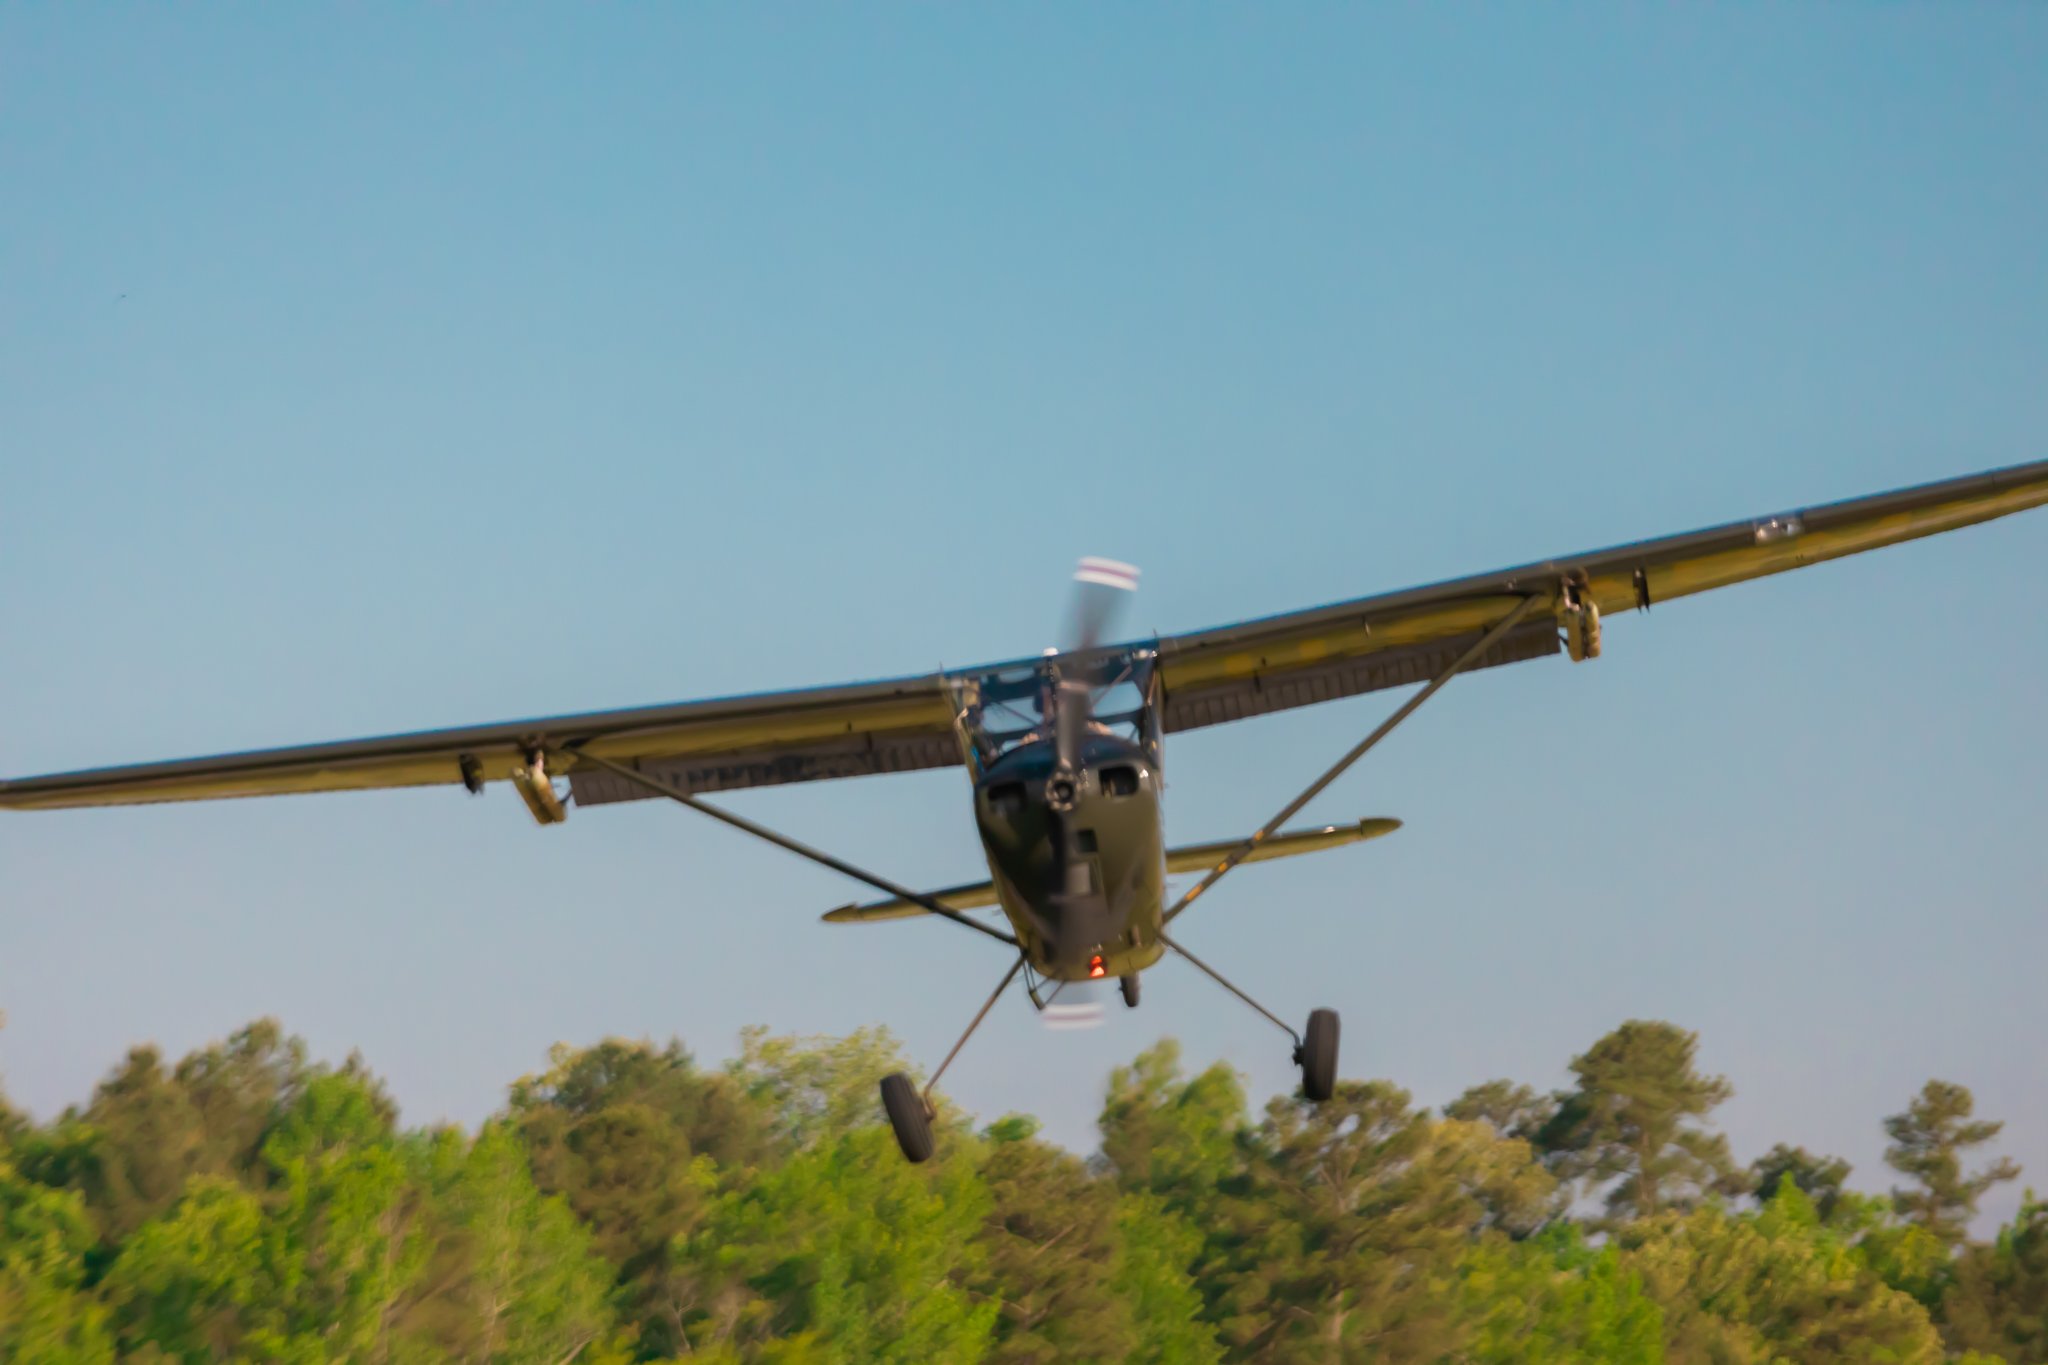
Cessna 172 - Canon EOS R, 200mm, Aperture F.13, ISO 100, Shutter 1/80
Conclusion
When capturing images of aircraft, just know that your shutter settings will vary depending on the type of aircraft and how fast it is passing by you. If it is passing you at high speed, you’ll want a higher shutter compared to when you’re capturing it on takeoff or landing. Always try to keep your ISO set to 100 if you possibly can! You can increase it a bit more if needed, but if you’re settings have your ISO above 1000 then you need to readjust settings to get it down lower. Always use stabilization if it is an option while using single point focus that is in the center of the frame. If you have the option on your camera to switch from one-shoot auto focus to servo then I would suggest switching over to servo! Hopefully this has given you some more information on capturing images of aircraft! If you are interested in purchasing any of the gear I use, please feel free to click on the affiliate links below! I have also included some more improved gear from Canon that will do just as well as my Canon EOS R. Thanks for visiting this month’s blog!
My Gear!
Canon EOS R: https://amzn.to/3zRCAWe
Canon EF 70-200mm f2.8: https://amzn.to/3nfqy16
More Updated Gear To Consider!
Canon EOS R6: https://amzn.to/3ncrkMo
Canon RF 70-200: https://amzn.to/3OyhUqq
AFFILIATE DISCLOSURE: This blog post contains affiliate links, which means that if you click on one of the product links, I’ll receive a small commission. I won't put anything here that I haven't verified and/or personally used myself.